
Posing Guide and Tips for Wedding Couples Portrait Sessions
- Chad Populis

- Apr 23, 2023
- 7 min read
Updated: Jun 29, 2023
A wedding day is one of the most important days of a couple's life and having beautiful photographs to remember it by is a must. Capturing all the moments of the events can be very challenging for photographers.
Wedding photography can be a tricky skill to master, especially when it comes to posing couples. The goal is to create a diverse portfolio of stunning images to add to their wedding gallery. With a limited amount of time to accomplish this (usually 20-30mins), having a posing guide will help with the flow of the session tremendously. Here are some starter tips to help you create the perfect gallery of the happy couple.
1. Practice posing. Practicing the poses beforehand allows the couple to become comfortable with being photographed. It's a good idea to speak with your couple prior to the wedding day to communicate how you want to pose them, the must-have shots, and how long you expect/suggest the session to last. I strongly suggest an engagement session so that the couple and photographer become comfortable with each other. This helps the couple become familiar with the process and instills more confidence on the wedding day. Ask them if there are any poses they are already familiar with, would like to try, or have a preference for. Instruct them on how you will direct them and send images and instructions on how to pose. Ask them to practice a few times before their wedding day. Another strong recommendation, if possible, is to schedule a First Look into their wedding day schedule, as this allows more time for all the formal portrait sessions and adds more variety to the wedding gallery.
2. Encourage Closeness and Intimacy. You want the poses to look natural and relaxed, so encourage the couple to be playful or whisper sweet nothings to each other. These small touches will help make the photos look more genuine and intimate. Your first poses should include lots of kissing, touching, and laughter. Always ask them how comfortable they are with each pose. If they feel awkward about certain positions, this will show through the photos - so be sure to avoid poses that they may strongly dislike later. Try not to stay in one position too long as this will also increase the awkwardness. Adjusting poses even slightly will keep the shoot exciting and the couple engaged leading to more organic and candid posing opportunities.


3. Start with the Basic pose. Before you start getting creative with poses, it’s important to get the basics down first. Have the couple stand in front of you and face each other, and have them put their arms around each other’s waists. This is the most common pose and it’s a great place to start.
Starting in a position of forehead-to-forehead or nose-to-nose. This may look weird or odd initially but it actually creates calmness and closeness.
Begin to add variation to this pose by adjusting the couple's head position in relation to each other - start both looking at the camera, one looking away, alternating directions, both looking away, one looking at the camera, and the other looking away, etc.
Change hand positions, bride's hand on the chest, on the groom's arm, both holding hands, both hands around the groom's shoulders or back of neck/head. Groom's hand is on the bride's shoulder, on the waist, slight touch to the forearm/elbow/wrist/hand.
Next, walk around the couple 360 degrees and shoot from different angles and lighting scenarios. Focus on different aspects and details - the bouquet, the hands, and rings, the couple's eyes, etc.
Don't forget to shoot at all 3 distance levels (wide, medium, and close). Combining these techniques allows you to get a variety of well-composed photos in a short amount of time without ever having to move your couple from the location.


4. Vary the positions. Once you’ve got the basics down, it’s time to start getting creative. Have the couple move around and try different poses. For example, have them turn their heads to the side or have one of them hold the other’s hand behind their back. These variations will make your photos look more interesting and dynamic. You can pose your couple side by side various distances apart, or one sitting and the other standing. Some classic shots are Couple walking away from with one or both looking back and also walking towards them interacting playfully and lovingly.
Other popular poses to try:
Couple facing opposite directions.
Groom hugging/standing behind the bride.
Bride hugging/standing behind the groom.
Couple laying down opposite directions head-to-head


5. Add some action. To add more energy to the session, you can try some action shots. Some couples have active lifestyles and are thrilled to act some movement to their pictures to best represent their connection. Before starting, always ask if the couple is willing and able to perform some of these more physical poses. Some popular action poses are:
Coupling running/jogging holding hands
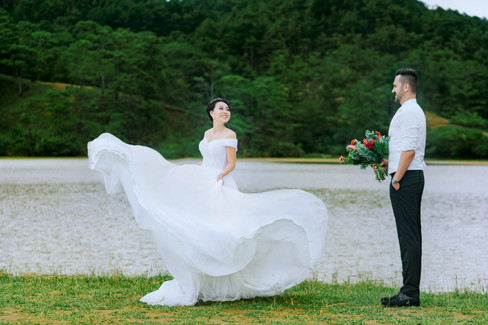
Groom twirling the bride and swinging the dress
Groom dipping bride
Groom lifting bride
Bride riding on Groom's back/neck
Wide shot of groom leading bride


6. Use props. Props can be a great way to add interest to your photos. A bouquet of flowers, a sign with the couple’s names, or a chair can all be used to create interesting shots. Couple kissing and snuggling under the veil are popular shots. Just make sure that the props don’t take away from the focus of the photo – the couple.


7. Include the environment. Be sure to include the scenery and location in the couple's photos. Part of telling the wedding story through photographs is showing where the event takes place. So incorporating the setting with the couple's portraits helps add to the memory and documents all aspects of the day.


8. Capture candid moments. You should also be sure to capture candid moments as well. Have the couple pretend to run away laughing, or have them spin around in circles. These moments will give your photos a more authentic and intimate look.


REMEMBER TO GET SOME SOLO SHOTS OF BOTH THE BRIDE AND GROOM - Throughout the entire wedding day!
Use the following quick checklist guide to organize your posing workflow
COUPLE POSES - Shoot each pose in vertical and horizontal perspectives. Be sure to capture different lengths and angles, adjust head position and hand position, with and without props.
CLASSIC - COUPLE FACING EACH OTHER. VARY HEAD POSITION. WALK AROUND.
PORTRAIT - COUPLE FACING CAMERA-CLOSE CONTACT. VARY HEAD POSITION.
ARTISTIC - SPOUSE A/B FACING CAMERA/SPOUSE B/A FACING AWAY. VARY HEAD POSITION.
SPOON - COUPLE FACING CAMERA. BRIDE IN FRONT. GROOM BEHIND.
REVERSE SPOON - COUPLE FACING CAMERA. GROOM IN FRONT. BRIDE BEHIND.
BACK-TO-BACK - COUPLES FACING AWAY FROM EACH OTHER. HOLD/TOUCH HANDS.
MODERN - COUPLE FACING CAMERA/EACH OTHER-SPACE BETWEEN. ADJUST DISTANCE.
WALKING 1 - TOWARDS CAMERA & AWAY FROM CAMERA. PLAYFUL INTERACTION.
WALKING 2 - SIDE SHOT WIDE. SIDE SHOT MEDIUM, BOTH SIDES. GROOM/BRIDE LEAD.
ACTION SHOTS - DANCE. TWIRL. LIFT. DIP. RUNNING. CARRY.
SITTING - ONE OR BOTH SITTING. FACING CAMERA.
LAYING - SIDE BY SIDE. OPPOSITE DIRECTIONS. HEAD-TO-HEAD
BRIDE SOLO - WITH AND WITHOUT PROPS. STANDING. WALKING. SITTING.
GROOM SOLO - HANDS IN POCKET. JACKET ON. JACKET OFF.


Begin with the more classic poses and then progress to more creative poses and then to action poses, as time allows. Making slight adjustments to head and hand positions saves time and gives more options for your couple's photos than changing the couple's body positions. Maintain the base pose until you've gone through all the minor adjustments first. Same basic minor adjustments to the Couple posing workflow can include:
FACE CUDDLES - look at each other, touch noses, touch heads, cheek to cheek, head on chest, chin on head, head on cheek eyes closed, look down, etc.
KISSING - "almost kiss" (no puckering), touch lips, kiss to head, kiss to chin, kiss to cheek, etc.
SAME DIRECTION - both looking toward camera, both look away, both look right, both look left, both look down, both look at rings/bouquet, etc.
OPPOSITE DIRECTION - bride/groom only looking toward camera; other looking away/at spouse/down/at bouquet, etc.
HAND ADJUSTMENTS - Both or one hand on each other's waist/chest/hip/thigh, softly touch each others elbow/hands/arm/shoulder, both or one arm around back of neck, Gently caress face/hair/head, arms around back/waist, hand in pocket/on chest/on lower back, holding hands, holding bouquet.
Don't forget to save time for Bride and Groom individual portraits. Many of the directions you give to them as a couple can apply while posing them individually.
BRIDE SOLO POSES - Camera angled slightly downward. Be sure to capture different lengths and angles, adjust head position and hand position, with and without props.
STANDING - Facing Camera, adjust head orientation, vary eye direction, with and w/o bouquet
SEATED - Sitting Gracefully in a Chair, looking away and looking into camera. holding bouquet
MOTION - Waking Away, looking back, looking into the distance, bouquet down and behind
CLOSEUP -Bride’s Face, looking at bouquet, staring into the distance
BONUS - Hands with Bouquet, bride looking at bouquet, smiling
RELAXED - By a Window, Gazing into the Distance
MIRROR - Both hands on thighs, adjusting/touching hair, admiring makeup/jewelry
SENTIMENTAL - Bride reading a note, appreciating a trinket, opening a gift, etc.
10 QUICK TIPS FOR MORE FLATTERING BRIDE IMAGES
Stand up straight with your shoulders back and head held high.
Have your chin slightly tilted down to elongate the face.
Connect your feet to create stability as well as curves in your body.
Cross one leg over the other, with your weight on the back leg.
Relax your shoulders and arms, keep them away from the body.
Slightly twist your hips toward the camera for asymmetrical angles.
Keep your expression natural and slightly smile.
Add movements and poses that make you feel confident and comfortable.
Smile with your eyes as much as with your mouth
Place your hands in relaxed poses; in front belly, playing in hair/face, across hips/shoulders
GROOM SOLO POSES - Camera angled slightly upward. Be sure to capture different lengths and angles, adjust head position and hand position, with and without props.
STANDING - Standing Facing camera, feet shoulder with apart, Hand(s) in Pockets
SEATED - Sitting on the Arm of a Chair, holding a cocktail/cigar, hand over hand, looking away
MOTION - Walking Away & Towards, looking away, jacket over shoulder/arm, hand in pocket
CLOSEUP - Groom Looking Into the Camera with a Serious Expression
BONUS - One Foot on a Stool, slight lean forward, look away and towards
RELAXED - Arms crossed, leaning against a wall or doorway
MIRROR - Adjusting coat, Adjusting bowtie/watch/lapel/boutonniere, admiring haircut/shave
SENTIMENTAL - Groom reading a letter, observing a photo, opening a gift, etc.
10 QUICK TIPS FOR MORE FLATTERING GROOM IMAGES
Stand with your feet shoulder-width apart, one in front of the other
Relax your shoulders and lift your chin and chest slightly.
Turn your body slightly away from the camera
Put your hands in your pockets to relax them, but don't hide them.
Hold your hand over your heart to display affection and appreciation.
Look away from the camera lens to add a more candid feel.
Place your hands clasped in front of you, left over right.
If you’re seated, have your legs uncrossed
Put a warm and gentle smile on your face
Play with your accessories, like cufflinks or a watch
These tips should help you get the perfect shots of the happy couple on their big day and provide them with a stunning and diverse wedding gallery. Just remember to have fun, create a relaxing environment, and keep it simple. Aim to make it organic as possible and to not over pose the couple – the best photos are the ones that capture the couple in their most natural state.

$50
Product Title
Product Details goes here with the simple product description and more information can be seen by clicking the see more button. Product Details goes here with the simple product description and more information can be seen by clicking the see more button

$50
Product Title
Product Details goes here with the simple product description and more information can be seen by clicking the see more button. Product Details goes here with the simple product description and more information can be seen by clicking the see more button.
$50
Product Title
Product Details goes here with the simple product description and more information can be seen by clicking the see more button. Product Details goes here with the simple product description and more information can be seen by clicking the see more button.


Comments